Coffs Harbour Public School Blog

Courtesy & Honour – Principal:Leonie Buehler

By

Digital Photography

Grade 5 students were introduced to digital photography as they were able to use a Canon 600D SLR camera to take images around their school courtesy of Southern Cross University. Suddenly the ordinary became interesting and the students eyes were opened as they viewed their environment with a photographers eye. Angles, lines, trees, paint on walls, an empty fruit juice popper were just some examples. They had to cope with the manual applications of the camera as they attempted to get clear, sharp images using different settings. The day was far too short but all the students worked extremely well and were highly engaged with this activity 🙂

5N and 5M Students


By

Antarctica 5N

This is what students from 5N worked on today as part of their Antarctica Stage 3 unit.

Mrs Newton and Mrs Booth

By

Stage 3 angles maths using FieldProtractor iPad app

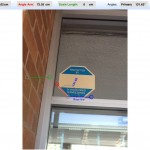
Today students from 5M road tested the FieldProtractor app for iPad. Mrs Booth thinks it is an excellent app for helping students develop a deeper understanding of angles. It is only $0.99 even though Mrs Booth thought it was around $4.00 when she bought it – sorry Oriana for giving you the wrong information:) It was a beautiful day and good one to get outside and discover and explore maths concepts in the school environment. The students estimated the angle first and then needed to identify if it was an acute, obtuse or right angle. Jacob was our photographer.


Mrs Booth and 5N


By

Stage 3 Gold Virtual Build

Stage 3 classes finished up with their HSIE Gold! unit last week. Many of the grade 5 students had been working on a virtual simulation of a gold rush town and the end result is wonderful. Mrs Booth filmed the build today but there were a few glitches with the program she was using!  Also some of the students missed out exporting their builds onto the sim due to various reasons but the overall result and watching the students collaborate on the shared sim as they terraformed the land, selected Eucalyptus trees, various grasses and images was brilliant. Some of the builds didn’t export well and this was a result of poor linking or ‘virtual gremlins’. A lot of learning on many different levels went into this project and all the students involved should be very proud of their work 🙂 Well done everyone.

Stage 3 Gold Virtual Build on PhotoPeach


My Place Website

My Place: For Teachers

Mrs Booth

We love comments


By

Can you build a heptagon?

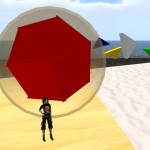
On Wednesday and Thursday both year 5 classes will be working with both the iPads and virtual technology for their maths lessons. They will be using the astronomy apps to continue with radius, diameter and circumference problems connected to the solar system, and using sim-on-a-stick to create a geometric shape called a heptagon…this will be tricky as it has 7 sides at an angle of approximately 51 degrees.


5N Virtual Geometry on PhotoPeach

How to draw a heptagon from Coffs Harbour PS on Vimeo.

By

Technology Tuesday

It was great to arrive to school and again find students from 5N working hard on their HSIE virtual projects. We also have an extra session after maths on Tuesdays to allow the students time to get their building finished.Thanks Mrs Newton 🙂

Mrs Booth is amazed at the bags of gold, pick axes, houses and furniture, tents, gold pans, pound notes, licenses and everything else that is being created. Students are using the grids for measuring and that higher order thinking has really kicked in. Fantastic work 5N.

I had to make a quick video of the terrific work they were doing this morning as I am very proud of them accomplishing so much in such a short space of time. This really amplifies the strength of learning when using 3D immersive technology.

Mrs Booth

How was your Tuesday spent at school?


By

iPad Circle Hunt Stage 3

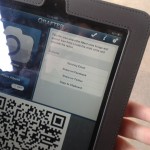
Both class 5N and 5M set off this week on a maths quest to find the radius, diameter, circumference and area of selected circles. They used iPads loaded with QR readers to scan the QR codes Mrs Booth had created. These had the clues needed to find the next circles location. The students were paired and armed with a worksheet, ruler, pencil and iPad.  There were some sharp minds as area and circumference are Stage 4 (grade 7) outcomes and some students managed to complete some or all of this section. Well done 🙂 Everyone loved using the Star Walk and Solar Walk Apps to get the answers to the astronomy section of the activity. A big thank you to Mrs Bullen for loading all the apps onto the iPads and making them available for us.

Also a big thank you to Ms Jacka for supporting class 5M on Thursday.

Here are the tasks they were set:
Using a ruler, measure the radius of the various circles. Then use the formulas you have been shown to calculate the diameter, circumference and area of each circle. Don’t forget to label your units and add squared ² onto an area.  If you finish all of these go to your iPad and Star Walk App and ‘Sky Live’ to locate the names of the four planets rising . You need to find the radius, length of year (Earth years), and surface temperature (Celsius) of each planet.

Formulas:

  • Pi: π=3.14
  • Diameter:  d=2r (radius x 2)
  • Circumference: C=πd (diameter x 3.14)
  • Area: a =πr² (radius squared x 3.14)
An example would be: A circle has a radius of 6cm therefore 6 + 6 = 12cm, and the diameter is 12 cm. The circumference is then 12 x 3.14 (pi) = 37.68cm. Finally the area is calculated 6 x 6 = 36cm and 36cm x 3.14 (pi) = 113.04cm2 ( area always has a squared symbol).

The idea for this lesson came from a great teacher in America called Mr Avery and the link to his excellent class blog is in the blogroll. Here is the link to his blog post about The great Circle Hunt of 2012.

Mrs Booth

Do you use iPads for maths?


By

Pyke, a virtual world expert

What a brilliant day 5N and a big thank you to Pyke, who  has become an ‘expert’ in a very short space of time! Mrs Booth was extremely grateful for his expertise as it was like having two virtual world teachers together in the same class 🙂 Other students supported each other and Noah was great helping the ESL students get started. This was a truly engaging, authentic and meaningful learning experience for the whole class on so many different levels, and Mrs Booth was thrilled at the cooperation, patience and tolerance they showed each other.

5N is terrific and are powering through their HSIE project builds with sim-on-a-stick, our virtual world platform that we use. Mrs Booth will be in an extra session for 5N on Tuesday mornings and run an extra Virtual World Library Club, Tuesday at lunchtime until the end of term.

Mrs Booth

Do you use virtual world technology for your school projects?

By

Eureka! It’s our virtual world lesson

5N were introduce to virtual world technology this week and are constructing gold fields and the early gold mining township of Ballarat for their HSIE project. Mrs Booth had downloaded a modified version of sim-on-a-stick on to the students USB sticks which contained building artefacts and scripts that would enable them to have success with the program. The engagement was immediate and nearly everyone has now started exploring and building. Mrs Booth will make time for those students needing extra assistance but she also believes that through individual exploration of the platform the greatest learning will transpire. There are now student ‘experts’ that can be drawn upon from 5M as a great resource when Mrs Booth is not at the school. Some students also had a maths lesson that morning with Mrs Booth focussing on volume which enabled them to ‘see’ an empty space 3 dimensionally, this will help them in their virtual building skills also, as the students all start any virtual building with a 3 dimensional shape.

5N and 5M Gold and Virtual World Technology on PhotoPeach

Mrs Booth


By

5M and 5N HSIE Gold Project

PANNING
A shovelful of sand, gravel and clay from the creek bed was placed in a pan. The prospector then PUDDLED the mixture. This means he placed the pan in flowing water, broke up the clay with his hands and mixed it with the water so that the water washed the clay away. Any large stones would then be removed. Shaking the pan well to cause gold particles to sink to the bottom of the pan, the prospector would tilt it, and with a circular backward and forward motion, swirl the water in the pan, allowing a little gravel to be washed over the lip of the pan into the creek. When the last of the sand had been gently washed off, any gold in the washdirt was left in the pan. The prospector would then sharply swirl the remaining water to spread out any specks of gold over the bottom of the pan.
CRADLING
Panning was slow, back-breaking work, so the next development was the cradle. The cradle consisted of a box, fitted on rockers, so that the operator rocked it to and fro. Inside the cradle was two sloping shelves with thin strips of wood fastened across them. These were called RIFFLES. On the top of the box part of the cradle was a sieve made of metal plate with holes punched in it. Often, two men worked the cradle, one shovelling the washdirt onto the sieve and the other working the cradle with one hand and using a DIPPER with the other to take water from the creek and pour it over the washdirt as the cradle was rocked. The sieve prevented any large pieces of stone going into the box. These pieces were checked at intervals to be sure none were nuggets and the sieve was emptied. The gold-bearing gravel passing through the sieve was washed down through the shelves and any gold present was caught in the riffles, while the gravel was carried through a chute back into the creek. Often blanket, felt or corduroy was fitted to the floor of the chute to catch any fine gold dust missed by the riffles.
PUDDLING MACHINE – Used for deeper mines
This was used by wealthier miners as a horse was needed and they were very expensive to buy and feed. As the miners dug, every bucketful of dirt removed would have to be washed and checked for gold. The stiff, yellow clay was very difficult to break up, so a PUDDLING MACHINE was often used to break up the washdirt and allow the gold to sink. Water and washdirt were added to a circular trough and the mixture stirred by a horse pulling a rake. The water became a soupy sludge, which allowed the heavy gold particles to sink to the bottom. The water was then drained off, and the layer of stones and gold left in the bottom of the trough was then panned, cradled or sluiced to recover the gold. Usually, one man on a goldfield would own and operate the puddling machine and miners would bring their dirt to the machine and pay the owner to put it through the puddling machine.  All information and images sourced from Sovereign Hill Education 

The Eureka Centre: Excellent resource for everything you need to know about the Eureka Rebellion

I will make an information page later today with instructions on how to link your objects and create a information note cards for your virtual projects 🙂

Mrs Booth


Skip to toolbar